Build your website in Berchtold
Build your website in Berchtold, import it from WordPress, publish pages and posts, make it public and connect your own domain.
Open Sites and select your website. If it is not built in Berchtold yet, select Build it in Berchtold. Your website gets a Home page and a free address like yourname.berchtoldhosted.com.
Select Edit website to open the builder in its own window. The content tree is on the left: Home is at the top and every page is under it. Your posts are under your blog page, by year, and each content type has its own folder. Under your pages are Legal pages and Website, with Menus, Categories, Tags, Content types and Settings. They open over the page. Close takes you back to it. The page is in the middle, with its controls on the right. Use Website overview on the site card to open the Overview.
Pages, posts and menus
- Pages hold your main content, like About or Sell. A page can sit inside another page. Its address comes from its Page address, like
/about. - Posts are your blog. Their address follows the Post address format in Settings, like
/blog/your-post. Add categories and tags to sort them. - Menus link your pages, posts, categories and tags. Put a menu in a location: the header, the footer or the phone menu.
A page or post starts as a draft. Select Publish to show it on your website, now or at a later date. If you change the address of a published page, visitors who use the old address go to the new one.
To take a page or post off your website, select Unpublish in its Publish box or in its menu (…). A scheduled one has Cancel schedule instead. It keeps its date, so Publish schedules it again. The home page stays published.
A page can send visitors to other pages, like its form's thank-you page or a landing page's guide. You can't publish it while those pages are drafts. The Publish window lists them. Select Publish all to publish them together. You can't unpublish or delete a page while a published page sends visitors to it.
Your blog
Your blog works like a WordPress blog.
- Posts are in the content tree under your blog page, in a folder for each year. The newest year is open. To add a post, open the blog page's menu (…) and select Add post. Or select + at the top of the content tree, then Post. Find a page or post finds posts too.
- Categories and tags: they sort your posts. In the blog page's menu (…), select Categories or Tags to add, edit or delete them. Categories and Tags are also under Website in the content tree. Close takes you back to your page. A category can sit inside another category. Each category and tag has its own page, like
/category/buyingor/tag/condos. - In a post: choose its Categories, Tags and Author in its settings (Edit on a phone). Type a new tag and press Enter to add it. Turn on Stick to the top of the blog to keep the post first on your blog page.
- Publish date: choose Immediately, or On a date and time to schedule the post. The time is in your website's time zone. A published post shows its publish date, with Immediately selected. If you publish it again, it keeps that date.
- Default post category: in Settings (under Website in the content tree), under Writing. A post you publish with no category goes in it. You can't delete the default category.
- Archives: your website also lists posts by year, month and day, like
/blog/2026/10, and by author, like/author/your-name. Long lists show page numbers. - A post's page: it shows its categories, tags and author, with links to the previous post and the next post.
- Excerpts: a post with no excerpt shows its first 55 words in lists and feeds.
- Feeds: readers and other apps can follow your posts at
/feed. Each category, tag, author and date list has its own feed, like/category/buying/feed. - Blog sections: in the page builder, the Blog group has Latest posts, Categories, Tag cloud and Archives. Add them to any page. They show your published posts.
The page editor saves drafts as you work. Menus, Settings and Legal details have a Save button. While the builder is open, they keep your changes when you close them or open another screen. A screen with changes you have not saved shows Not saved in the content tree. If you open a page before you save, the builder asks you first. When you save, the changes show on your website at once. Save before you reload the window.
Use the page builder
In the content tree, select a page to edit it. Right-click its name or open its menu to rename it, move it or add a page inside it. The menu also has Preview, Unpublish and Delete page. Before you delete a page, the builder tells you if it is published and which menus link to it. Sections lists the sections on that page. Select one to see its Content and Layout controls.
Use Add section to add content. New sections go after the one you selected, or at the end of the page. Empty pages still show your header and footer. Use Design to change the template, styles, header or footer of every page. A new template adds starter pages only when you tick Add missing starter pages. On smaller screens, Page tools, Brand resources and Design are in the Tools menu.
Edit on the page
Click the text on the page and type. This works for headings, paragraphs, button text, captions, questions and answers, steps and numbers. In a paragraph, press Enter twice to start a new one. Press Escape to stop typing.
- Formatted text: click in it. Its toolbar shows above the page, for headings, bold, lists, quotes and tables. To add a link, select the words, select Link, type the address, then select Apply.
- Buttons: type the button text on the page. To change where the button goes, select Link in the section's toolbar.
- Images: select Change image on the image, or Choose image where a section has none yet.
- Team profiles: each person can have a company Logo and links to their Facebook, Instagram and LinkedIn. The links show as icons. Use this for a partner on a shared page, like a lender.
- Disclosures: add the legal words a page must show, like a lender's license number and Equal Housing Opportunity. They show in small print.
- Lists: select Add to under the list to add an item. The trash button on an item deletes it.
The selected section has a toolbar above it with its most used options, such as Text position or Color. It also has buttons to move, copy or delete the section, and AI writing for the text you are typing. All settings opens the rest of the section's settings, such as images, button links and layout. You edit its text on the page itself. On a phone, the toolbar sits under the page. Move, copy and delete are in its … menu.
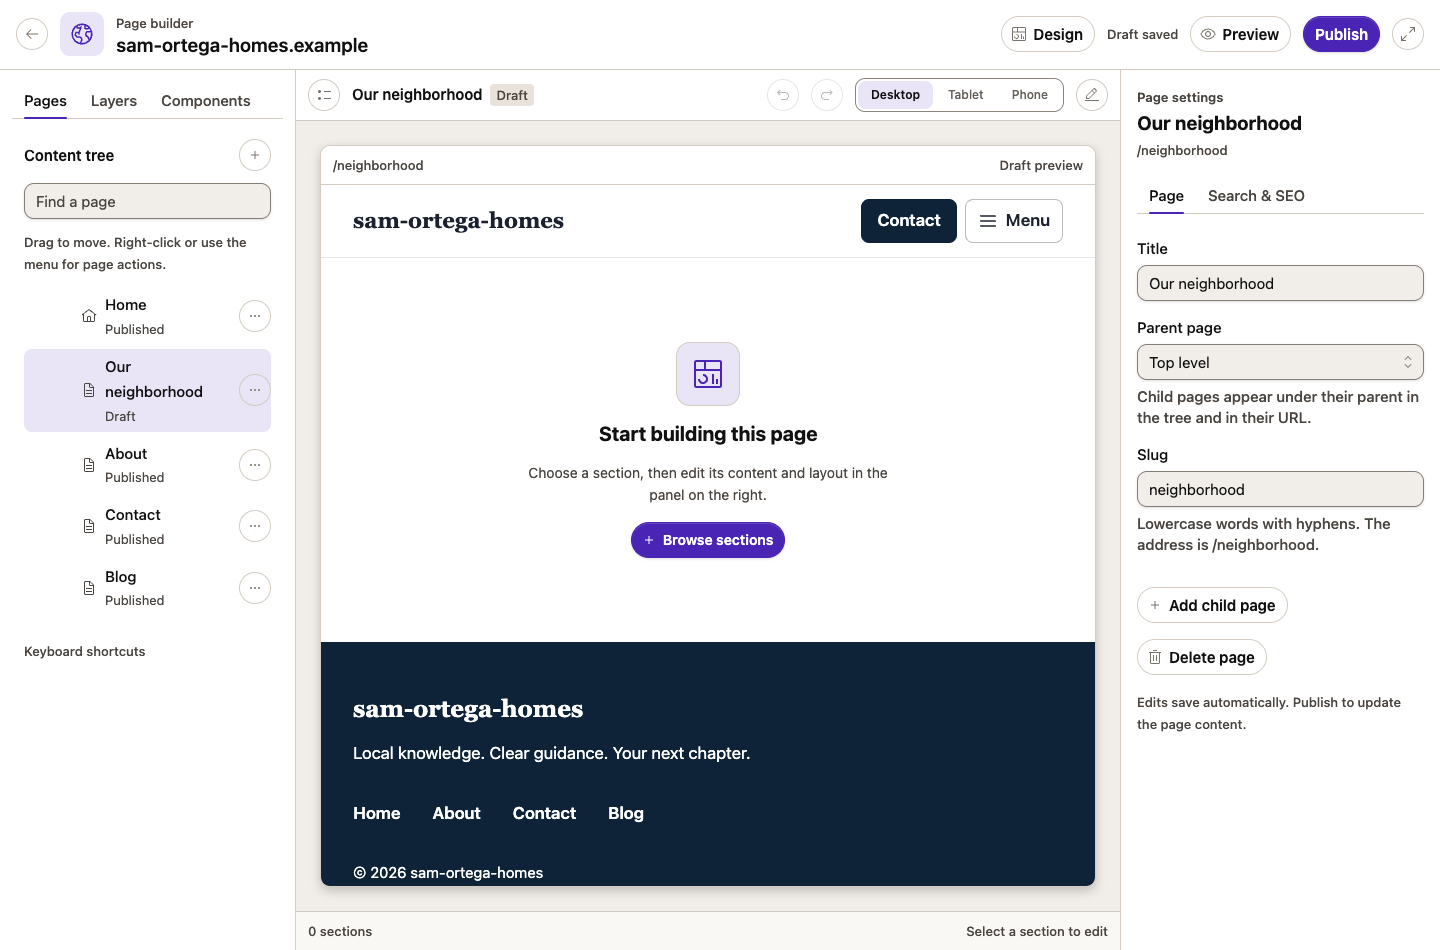
Draft saved means your edits are saved. They are not on your website yet. A published page that you changed shows Changed since publishing until you publish it again. Use Preview to check your draft first.
If a draft can't save, select Review fields to go to the field you need to fix. The Publish window also links to each field that needs work. Fix the field, then try again.
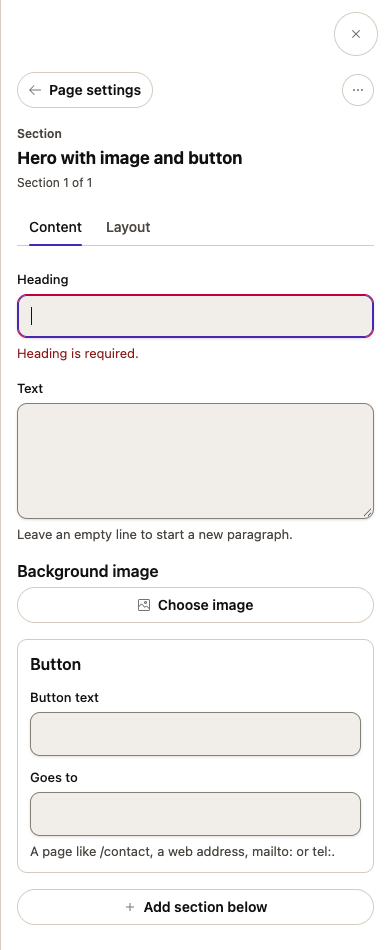
On a phone, use Content tree to open the left panel and Edit to open the controls. Close takes you back to the page. With a keyboard, Escape closes the panel too.
Writing, history and review
Use what your business has saved
Open Brand resources in the builder. Search your saved business details, locations, published pages, brand facts and approved examples. Add to page adds text to your draft that you can edit. Add page link links to a page you already have. Add from media opens your media library. Undo removes what you added.
The panel uses the brand and locations of this website. It shows only what you have permission to open. Refresh sources checks for new information. If something does not load, the panel says so and you can try again.
In Design, select Use brand styles to preview saved brand colors and font choices on your current page. Pick named brand colors in Styles. Choose a saved logo or media file in Header. Use the brand tagline or location details in Footer. You can also use a saved call to action for the header button. If your website can't load a brand font, it shows a similar standard font.
When you change the template, your styles, header button and footer text stay. If your brand guidelines have fair housing words, every page shows them at the bottom, landing pages too. Set them in Settings → Brand guidelines → Legal. Design changes show only in the preview until you select Save design. Saving changes the design of your published pages too.
AI writing uses your brand voice, your business facts and the examples you approved. Open Sources next to a suggestion to see what it used. Approved examples guide the writing. They never show on the page as facts. Check the facts and wording before you apply a suggestion or publish the page.
Write and review
Select AI writing next to a text field to improve, shorten, expand or translate it. In Search & SEO, it can also draft a search title or description. Review the original and the suggestion, then select Apply to draft. A suggestion is not saved or published until you apply it.
Use known page and search data
Open Page settings → Search & SEO. The preview uses the page's search title and description from Content Audit. Where they fit, it also uses your brand's name and details. Each suggestion shows where it came from. Fill empty fields adds them to your draft and keeps the text you already wrote. You can also apply one suggestion at a time.
Page search performance shows Google Search Console results for this page's address. It shows clicks, impressions, click-through rate, position and top searches. Recommendations for the page show here too. Saved page results shows the totals in Content Audit. Content Audit did not save their dates, so they may differ from the results above.
AI writing uses this page's search results and your brand details. If you refresh the panel, your edits stay. Apply suggestions to the draft, then publish when you are ready.
Open Page tools > History to compare saved versions with your current draft, the published page or another saved version. You can preview a version, or restore its content as a new draft. Restoring keeps the page's current address and its published version. Berchtold keeps the last 50 saved versions and the published version.
Use Page tools > Review to choose a reviewer and an optional due date. Add a comment and select Request review. The reviewer can approve the version or request changes. Review requests and decisions show in each person's notifications, as their settings allow. Comments and decisions stay in the review's activity.
An approval is for that saved version. If you edit it, ask for a new review before you publish. Approval does not publish the page. You can't publish a version that still needs approval. The Publish window says so and has Request review. Select Return to draft to withdraw a request, make changes or choose another reviewer.
Language versions
Open Page tools > Languages to create an English, German, Spanish, Italian or Chinese version. Each language version has its own content, draft and published page. If a page has a parent, create the parent's language version first.
A new language version starts with the source content. Edit it yourself, or select Translate page with AI. Review the suggestions before applying them. Check the whole page, then select Mark translation as reviewed. Publish it when ready.
If the source page changes, the language panel asks you to check the translation. A published page links to its published language versions. Drafts and scheduled versions are not linked. Translated addresses start with the language, such as /es/about.
Move sections
Drag a section's preview card from Add section into the page. Or select its button to add it after the selected section. Drag sections in Sections to change their order, or use Alt+Up and Alt+Down. Undo brings back the last change.
Import from WordPress
A workspace admin can import a WordPress website that has the Berchtold Abilities plugin. The import brings posts, pages, FAQs and team members, with their categories, tags, images and search titles. WordPress's Latest Posts, Categories, Archives and Tag Cloud blocks become the same sections here. Images go into your media library. Import again later to bring in what changed.
On the Overview, the import card shows From: and the WordPress website it reads. That is your workspace's WordPress connection. If there is no connection, select Connect WordPress first. Select Check to see what will come in, then Import. When it finishes, select Review imported drafts in the editor.
The import report lists what it did not bring in, such as shortcodes and reusable blocks. Other code blocks come in as Custom HTML blocks. Property search widgets from another IDX provider, such as iHomefinder, are left out. Berchtold's own property search replaces them. A page that held only such a widget comes in as a draft.
Content types
A content type is a group of pages with the same details. For example, each neighborhood can have a median price and photos. Each one, called an entry, has its own page. A content type can also have a list page that shows each entry's title, image and excerpt.
To make one, select Edit website. In the content tree, under Website, select Content types, then New content type:
- Enter its name, like Neighborhoods, and the name of one entry, like Neighborhood.
- Check the Address. Each entry's address starts with it, like
/neighborhoods/old-town. You can't change it after you add entries. - Select Add field for each detail an entry has. Give it a name and a Field type, such as text, number, images or a choice. Turn on Required to publish if every entry needs it.
- Select Create content type.
The list of content types shows how many entries each one has. Select Show entries to open its folder in the content tree. In a folder's menu (…), Edit content type opens the content type.
The entries are in the content type's folder in the content tree. To add one, open the folder's menu (…), select Add, then the content type. The entry opens in the page builder. In Page settings, the Fields tab holds its fields, its excerpt and its featured image.
On the entry's page, its details show as a list above the content. To show one somewhere else, add a Field block and choose it. It then leaves the list.
You can delete a content type when it has no entries. Delete its entries first.
Show MLS listings (property search)
Your website can show listings from each MLS your workspace has a data license for. You get:
- a property search page at
/homes-for-sale; - a page for each listing;
- blocks you can add to any page, in the Listings group: Property search, Listings, Market numbers, Open houses, Map search and Mortgage calculator.
Listings shows a grid. Set Layout to Carousel to show one row that visitors scroll. Open houses lists the open houses in the next 7 or 14 days, by day. Map search shows the matching homes on a map. The first ones also show in a list, with a link to all of them. The map uses OpenStreetMap data and needs no setup. The editor shows the number of homes where the map goes. The map shows on your published website. Mortgage calculator estimates a monthly payment from a price, a down payment, a rate and a term. Visitors can change each value.
Home value request, in the Calls to action group, is a form where owners ask what their home is worth. Each request adds the person to your CRM as a seller lead, and the contact's owner gets a notice. An automation can start when someone asks for a home value. With the Real estate part, your website also has a home value page at /home-value. See Your home value page.
In the builder, Listings and Market numbers blocks show real listings and numbers from your workspace's MLS data license. Change a block's filters or How many, and the page shows the new homes. These listings are a preview for you. They are not saved in the page.
Your workspace's MLS data license covers your website. A broker's license covers every agent's website in the workspace. An agent's license covers that agent's own website. A website does not need its own MLS approval.
Some MLSs name each website in their data agreement, for example Baldwin REALTORS MLS. For those MLSs, listings show only on the website addresses the agreement names. Ask Berchtold to add a new website to the agreement before you publish it.
On the Overview, Property search shows each MLS and whether its listings show on this website. Listings paused shows the reason. Most often, the MLS has not sent new data in a while. You do not need to do anything. The listings come back when the MLS data is up to date. Two other reasons need Berchtold's help. The MLS agreement may not name this website's address. Or your firm and agents did not pass the MLS's daily check. Select Refresh MLS status to check again. Listings show on published pages when the website is public.
Listing pages show the notices the MLS requires. These include the data source, the time of the last update and the listing brokerage. You can't turn these notices off. AI tools that read websites are blocked from your listing pages.
If your workspace has no MLS data license yet, a workspace admin can request one. On the Overview, select Open Settings > Integrations.
Property search pages
The page tree has a group called Property search pages:
- Homes for sale: the search at
/homes-for-saleand its results; - Listing page: the page of each listing;
- Market page: the pages of each market;
- Your account: the visitor's account page at
/account.
Berchtold fills the built-in part of each page: the search, the listing, the market or the account. Add your own sections above or below it, such as a short intro or a call to action. Move the built-in part to change where it goes. You can't delete or copy it.
The sections you add to Listing page show on every listing page. The sections you add to Market page show on every market page. Publish a property search page to show its sections on your website. Until you publish it, the website shows only the built-in part.
In the builder, the built-in part shows real data from your MLS data license. It shows the first homes for sale, your newest listing or your first market. The search form there does not work.
You can't change their address or delete them. You also can't put pages inside them or make them in another language. Only Homes for sale has its own search title and description. Each listing page and market page gets its title and description from its listing or market.
Leads from your website
Visitors can create an account on your website. They can save homes, save searches and ask about a listing. Each one goes to your CRM:
- A new account or a listing question adds the person as a contact. If a contact has that email, it updates that contact. The contact's owner gets a notice.
- A listing question can ask for more information or for a tour.
- A saved search can email the visitor new listings: instantly, daily or weekly. Each email has a link to stop them.
- Saved homes and searches show on the contact, in the Website section. There you can add, change or delete a saved search for a client. You can also select Save a home and enter an MLS number. The home shows in the client's account on the website.
- Automations can start when a visitor signs up, saves a home or a search, or asks about a listing.
What visitors see in their account
Visitors sign in with a link that Berchtold emails to them. There are no passwords. A short notice shows under Create account. It says that you may contact them by email, and by phone if they give a number. It links to your privacy policy and terms.
On their account page, visitors can:
- rate each saved home from 1 to 5 and add notes. You see the rating and notes on the contact, in the Website section;
- rename a saved search and see how many homes match it now;
- change how often market emails come, or stop them;
- change their name and phone. The contact in your CRM changes after they confirm their email;
- delete their account on your website. Their saved homes, searches and email alerts there are removed. The contact stays in your CRM.
Ask visitors to sign up
In Settings (under Website in the content tree), under Visitor accounts, choose Ask visitors to sign up. Choose 3, 5 or 10 homes. When a visitor looks at that many homes in one visit, a window asks them to create an account. They can close it. It asks once a visit. The default is Never.
Privacy policy and terms of use
Your website has a privacy policy at /privacy and terms of use at /terms. Berchtold writes them from your legal details, in your website's language. The footer of every page links to both. The notice under Create account links to them too.
These pages are a starting template, not legal advice. Have your lawyer review them.
In the builder's content tree, under Legal pages, select Legal details:
- Enter your business name, mailing address, contact email, contact phone, the state for governing law and the effective date. Leave a field empty to use your workspace's details. Each field shows what the pages use when it is empty.
- Select View to open a page on your live website. Select Edit page to open it in the builder.
- Turn off Show Berchtold's privacy policy text or Show Berchtold's terms of use text to show only your own sections. Berchtold's text shows until you publish your own sections.
Select Save legal details. The pages change on your website at once.
In the builder, the page tree has a group called Legal pages. A legal page you have not published shows Standard text: visitors see Berchtold's text. Add sections above or below the text, then publish the page. It then shows Live. You can change its title, search title and description. You can't change its address, delete it or make it in another language.
If your workspace tracks visits, the privacy policy says so. It also tells visitors how to stop it. They turn on Do Not Track or Global Privacy Control in their browser.
Make your website public
Until you make it public, visitors see a "coming soon" page. The Publishing card on the Overview shows Coming soon or Public.
A website goes public on a domain of your own. Connect your domain and make it the primary domain first (see Connect your own domain). Your berchtoldhosted.com address is for previews. Market reports, listing alerts and sign-in emails link to the primary domain.
- Select Make the website public.
- The window shows a checklist: the home page, the primary domain, the pages that emails link to, and tracking. You need a published home page and a primary domain to go on. Select Edit the home page or Go to Domains and email links to fix them. The other items can wait.
- To let Google and other search engines list your pages, select Let search engines find this website. You can change this later in the builder's Settings.
- Review the address and confirm.
Visitors then see your published pages. Your drafts stay drafts. To hide the website again, select Show the coming soon page.
A website that was public before it needed a domain stays public. Its Domains and email links card says it needs a domain. Until you connect one, its emails link to its berchtoldhosted.com address.
Only the website's owner or a workspace admin can make it public or change its domain.
Change your Berchtold address
Your Default address ends in berchtoldhosted.com. On the Overview, select Rename default address and enter a new name. The old address sends visitors to the new one.
Connect your own domain
The Domains and email links card on the Overview lists your domains. Each domain shows its DNS: DNS works, Waiting for DNS or DNS problem. It also shows Secure and its role: Primary or Redirects to primary.
- Enter the address visitors use, like
www.yourwebsite.com. Select Add domain. - Within a minute, a table shows the DNS records for the domain and for the same domain without
www. Select Copy next to each name and value. A name of@means the domain itself. Some DNS companies want that name left blank. A subdomain likewwworpagespoints to your website's ownberchtoldhosted.comaddress. - Add the records at the company that manages your domain's DNS. If you use Cloudflare, turn off the proxy (grey cloud) for these records. If someone else manages your DNS, select Email these steps to send them the records from your own email.
- Select Check DNS, or wait. Berchtold checks every domain every 10 minutes. When its DNS works, your first domain becomes the Primary domain. Your Berchtold address and the address without
wwwthen send visitors to it.
Adding a domain does not change your primary domain. To use another domain, wait until it shows DNS works. Then select Make primary next to it and confirm. Every other address, the old primary domain too, then sends visitors to the new one. Only a domain whose DNS works can be primary.
If a domain shows DNS problem, the card says what went wrong and what to do. If the domain is connected to another website service, remove it there first. Then select Remove and try again. If the domain's check was slow or did not finish, select Check DNS again. Check now checks every address of the website at once.
Do not change your DNS records until your website is ready. While you build, your current website keeps working.
The address your emails use
The card shows the exact address your emails link to. It shows a sample link for a market report, a listing alert and a sign-in email. Select Send me a test report to get a market report with these links. Only you get it. No subscriber gets it, and Berchtold saves nothing.
The market report's home value link opens your home value page at /home-value. See Your home value page.
If your domain stops working
A primary domain can stop working, for example after a DNS change at your registrar. Then the card and the Sites list show Domain problem. The website's owner and the workspace admins get one email and one notification. Until the domain works again, emails link to your berchtoldhosted.com address. Those links keep working, and they send visitors to your domain once it is back. Fix the DNS records, then select Check now. The problem clears when the domain works.
Visit tracking is separate from your domain. Tracking domains, under Manage connections, lists the websites that may send visits and clicks to Berchtold. A website built in Berchtold already has the tracking script. Add it only to websites hosted somewhere else.
Custom code
A workspace admin can add code to every page, like a Google Analytics tag. Add it in the builder's Settings, under Custom code. The code runs on your public website exactly as you wrote it. It does not run in previews or in the editor.